Reprap ?
The reprap project provides the designs and drawings necessary to make a self replicating, plastic extrusion 3D printer. There is only one hitch: self replication; you need a plastic printer in order to make one. Failing that you need to bootstrap your printing world by building a 'repstrap' - something that can (just about) print the pieces.
An ad-hoc repstrap
I have knocked together such a thing from spare bits of floating timber (mostly MDF and ply-wood), which has some unpleasant calibration problems: related to thermal issues, and a lack of an adjustable, (or even better heated) bed. Nevertheless it can be persuaded to print useful things. Indeed - arguably it is easier to cut a nice, rigid sheet of MDF, than to create isometric triangles made of studding with complicated plastic verticees. Anyhow - the beastie re-uses almost all the parts: steppers, controllers, belts etc. from an existing reprap - so you can re-use them in the final product (in theory). It also requires only simple hand-tools (except for the extrusion nozzle, and knurled driver which is a pain generally). It looks a little bit like this:
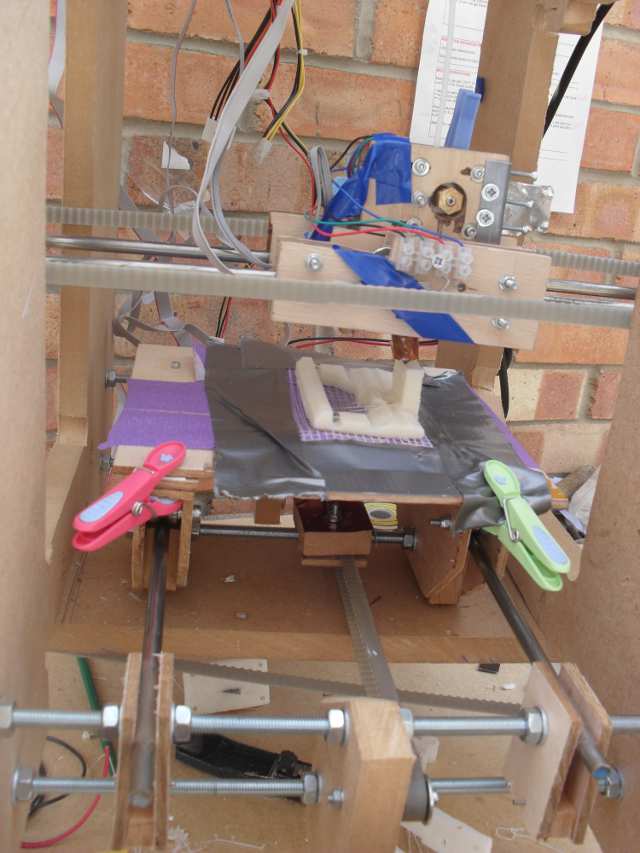
Notice the horrific warping problems that come from poor print head - bed spacing calibration, and the lack of a heated bed. Still, this is one of the largest, and most problematic prints necessary to bootstrap. I have the vague intention to create useful drawings, and instructions to replicate/iterate it for others with low-precision tooling - but the joys of LibreOffice are ship-wrecking this aspiration currently. Please also note that the all-important safety goggles are just out of frame somewhere.
Making large z axis gears
One of the most fun problems of repstrap construction are the gears. After several attempts - to whittle gears from acrylic rod, to make them from MDF, and so on I hit on a near perfect solution, reproduced here for your gear-constructing pleasure.
It turns out that simple 30mm panel-pins fit rather snugly into the required timing belt, creating a nice firm fixing. So - this makes the construction of the large gears a matter of rough cutting vague disk shapes, (or better using a nice large circular cutter) four disks from thin ply-wood, then using the stencil linked below - marking out the pin locations, drilling them through (as vertically as possible) with a 0.5mm drill, and then simply pressing the pins through. This and a pair of nuts in the centre yields a beautiful, functional z drive, as modelled by my youngest, as she concentrates on reprap assembly thus:

Stencils for gears
It turns out to be remarkably hard to draw gears, or lay them out manually by measurement. Luckily most people have a phenomenally accurate ink-jet printer. Thus simply print out this file: gears.odg - clearly using LibreOffice if you don't have it. Then use a bradawl to make holes to enlarge with a drill in the right positions.
Making stepper gears
These smaller gears present a real problem for ply-wood - which would just crack and split, and not provide enough purchase on the shaft of the stepper. After some initial semi-functional attempts with some aluminium, I discovered that the perfect material for small pin gears is near to hand, and luckily is stocked in your kitchen, it looks like this:
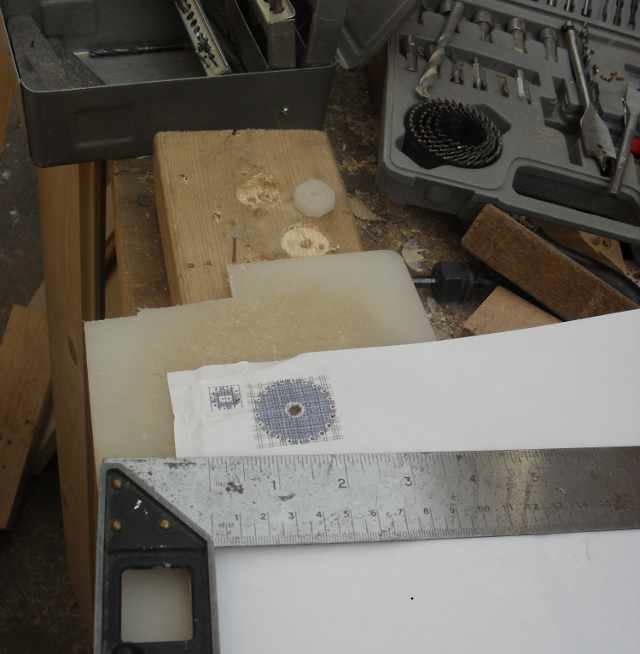
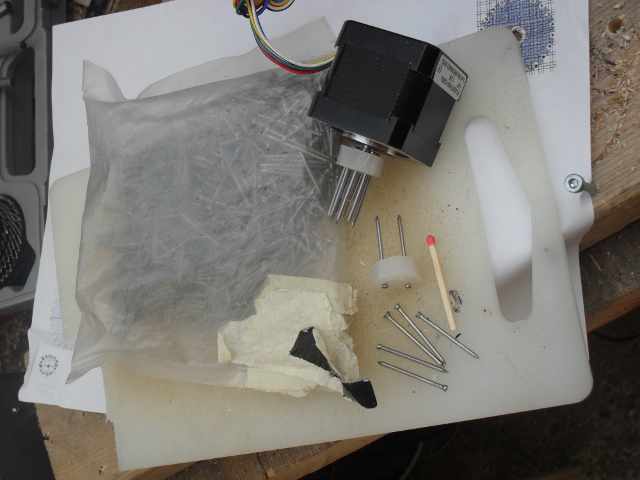
Naturally, it is only a matter of explaining to a suitably patient wife, her desparate need of a new chopping board, and the invaluable nylon is procured. To satisfy yourself that it is indeed a wonder material, try driving a panel pin into it 5mm from the edge, and then breaking it out. Attack the chopping block with a junior hack-saw or some such device, to make an octagonal piece of suitable diameter. Again use the bradawl, stencil, and 0.5mm drill as above. Drill a larger central hole, which should be of a slightly smaller diameter to the drill shaft (which should have flats filed onto it). Simply 'drift' (ie. wallop with a hammer) the nylon onto the shaft for a fool-proof fix. Eventually you end up with something beautiful like this:
Why bother ?
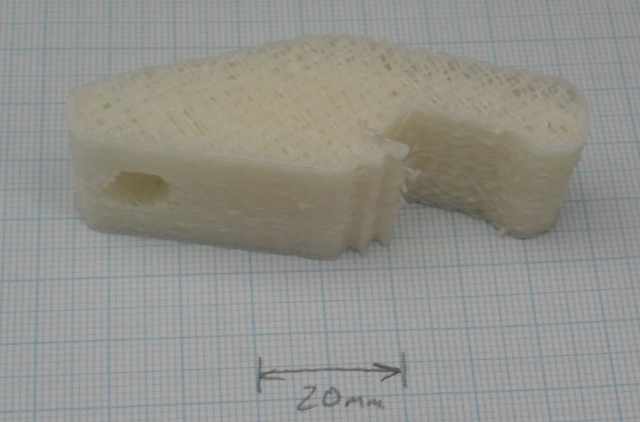
Hopefully, after much more wood hackery, adjustment, suffering, remedial medical treatment and so-on you can finally produce a working 3D printer, and hence something actually worthwhile. While this is only a prototype - and died on the first attempt of a lawyer to bend it, the full (more solid) version has resisted the attempts of a long line of hackers in their eagerness to break the end off; enjoy:
Of course, you really need to use RepSnapper on openSUSE for controlling that sort of thing.
